
In this lesson (8 sections)
Key takeaways
- Face a window with soft daylight. Never sit with the window behind you.
- Turn off overhead lights when you use daylight, so you don't mix colors.
- For sound, distance beats price: get the mic close to your mouth.
- Soft things in the room (rugs, curtains, a sofa) cut echo more than any software.
- Your first purchase should be a cheap clip-on mic, not a light.
Good lighting and sound on a budget come down to two moves: face a window so soft daylight falls on your face, and get a microphone close to your mouth in a room with some soft furniture. Neither needs money. If you buy one thing, make it a clip-on mic for under $30, because people can watch past average video, but they can’t follow words they can’t hear.
This lesson shows you how to set up both, with three budget levels and fixes for the most common problems.
Why light and sound matter more than your camera
Phone cameras are good in bright light and noticeably worse in dim light. In a dark room, the phone raises brightness digitally, which adds grain and smears detail. So the cheapest way to make a phone look like a “better camera” is to give it more light.
Sound matters for a second reason: most shorts are talking videos. If people can’t make out your words, the video fails no matter how it looks. TikTok’s checklist for creators making videos for business asks whether your voice is audible and whether spoken words stay clear over any music. Clean audio also helps captions. YouTube notes its automatic captions can get words wrong because of background noise, and the same goes for any caption tool.
Lighting with a window ($0)
A window is a big, soft light source, and it’s free. Here’s how to use it.
Where to sit
- Face the window, or sit with it slightly off to one side (about 45 degrees). The light should hit your face.
- Never sit with the window behind you. The camera will expose for the bright sky and turn you into a dark shape.
- Phone between you and the window, or just to the side of it, so the lens looks at your lit face.
When to film
- Cloudy days are your friend. Clouds spread the light out, so shadows are soft and skin looks even.
- Direct sun is harsh. If sunlight is pouring in, hang a thin white curtain, a white sheet or baking paper over the window to soften it.
- Light changes through the day. If you batch film, pick a window and a time of day that works and stick to it, so videos in a series match.
Turn off the room lights
When you use daylight, turn off overhead lights and lamps. Daylight is cool and bluish. Most home bulbs are warm and orange. Mixing them gives you a face that’s two colors at once, and no editing app fully fixes it.
Tip
Put a white sheet of foam board, a pillowcase or a large piece of paper on the side of your face away from the window. It bounces light back and fills in the dark side of your face. Professionals call this a reflector, and the cheap version works almost as well.
Lighting with a cheap lamp or LED
At night or in a room without a good window, you need your own light. You don’t need a kit.
The one-light setup:
- Put one light in front of you, about 45 degrees to one side.
- Raise it slightly above eye level, pointing down at your face.
- Make it soft: the bigger the light source compared with your face, the softer the shadows. Shine it through a white shower curtain, bounce it off a white wall, or buy a small softbox.
- Use the bounce trick from above on the other side.
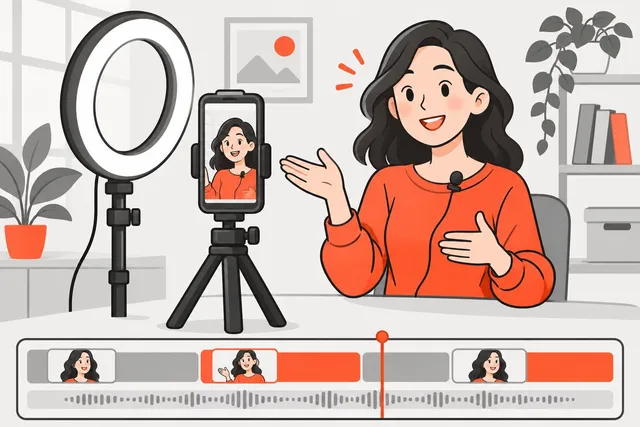
Ring lights are popular because they’re simple. They give flat, even light with few shadows and a ring reflection in your eyes. That suits beauty, makeup and close talking videos. For a more natural look, a small LED panel to one side is usually better.
A second light behind you, aimed at the wall or a shelf, separates you from the background and adds depth. This is a nice upgrade, not a must.
When buying any LED light, look for adjustable brightness and adjustable color (warm to cool). Then you can match it to daylight or to your room.
Sound: get the mic close
This is the single most important audio rule. A microphone picks up your voice and the room at the same time. The closer it is to your mouth, the louder your voice is compared with echo and noise.
A rough guide for distance from mic to mouth:
| Mic distance | What it sounds like |
|---|---|
| Phone across the room (2 m / 6 ft or more) | Hollow, echoey, noisy. Avoid. |
| Phone at arm’s length | Usable in a quiet, soft room. |
| Phone or mic around 30 cm (1 ft) | Clear and close. Good for most shorts. |
| Clip-on mic on your collar | Clear and consistent, even if you move. |
If you don’t have a mic yet, put the phone closer and frame tighter. A slightly tighter shot with clear sound beats a wide shot that sounds like a cave.
Your phone’s built-in sound options
Phones have a few settings that help. On iPhone 16 and later, Apple lets you choose Spatial Audio, Stereo or Mono in Settings > Camera > Record Sound, and wind noise is reduced automatically when recording in Spatial Audio or Stereo. For a single talking voice, Mono is plenty.
If you record in Spatial Audio, the Photos app’s Audio Mix lets you change the sound after filming. The Studio option reduces background sound and reverb, and In-Frame reduces voices and sounds from people outside the shot. It’s useful for a clip that came out noisy, but it can’t rescue a voice that’s buried under a loud room.
Supported AirPods can also be used as the microphone while you record on an iPhone. Earbuds sit near your mouth, so they often sound better than the phone at arm’s length.
Cheap microphones that are worth it
You don’t need a studio mic. For phone-shot shorts, these are the options, roughly in order of what to buy first:
- Wired clip-on (lavalier) mic. Plugs into the phone and clips to your collar. Very cheap and very effective. The cable limits how far you can move.
- Wireless clip-on kit. A small transmitter clips on you and a receiver plugs into the phone. Costs more, but you can walk around and film from farther away. Most kits come with two mics, which is handy for interviews.
- Shotgun mic on the phone. Mounts on top and points at you. Better than the built-in mic, but still picks up the room, so it only helps if you’re close.
- USB desk mic. Great for voiceovers recorded at a desk, less useful for on-camera clips.
Check that whatever you buy fits your phone’s port (USB-C or Lightning) or connects wirelessly, and test it before a real shoot.
Tip
Clip a lavalier mic about a hand's width below your chin, in the middle of your chest. Keep it away from necklaces, hair and jacket zippers, which rub and rustle on every movement.
Kill echo and room noise
Echo
Echo (or “room sound”) comes from your voice bouncing off hard surfaces: bare walls, tile, glass and wood floors. Fabric soaks it up.
- Film in the softest room you have. Bedrooms and living rooms with a sofa, curtains and a rug are usually best. Bathrooms and kitchens are worst.
- Add soft things around you, especially behind the camera, where your voice hits first. Blankets, cushions, a duvet over a chair, a rug on the floor.
- For voiceovers, a closet full of clothes is one of the best free recording booths there is.
Try the clap test: clap once and listen. A sharp ring or flutter means more fabric is needed.
Background noise
- Turn off fans, air conditioning, heaters, the fridge if you can, and anything with a hum.
- Close windows. Film when traffic and neighbors are quiet.
- Put your phone on Do Not Disturb so notifications don’t sound mid-take.
- Before your first line, record 5 seconds of silence. Many editors use it to learn what the noise sounds like and remove it.
Always listen back with headphones before you film the rest. Phone speakers hide hiss and echo that viewers with earbuds will hear.
Three budget setups
| Budget | Light | Sound | Room |
|---|---|---|---|
| $0 | Window in front of you, room lights off, white paper as a bounce | Phone close, or earbuds with a mic | Soft room, blankets behind the camera |
| Around $40 | Same window, plus a cheap clamp or desk lamp with a soft shade for evenings | Wired clip-on mic | Same, plus a rug |
| Around $100 | One small LED panel with adjustable color and brightness | Wireless clip-on kit | Same, plus a light behind you on the background |
Spend on sound before light. Most homes have a usable window. Very few have a usable microphone.
If you film long recordings like podcasts or streams and cut them into shorts later, these same fixes apply to the long recording. Better sound in the source means cleaner clips and more accurate auto captions, whether you edit by hand or use a tool like Short.now to cut the clips for you.
What’s next
With a clean picture and clear sound, you’re ready to turn raw takes into a tight short. Next up: how to edit short-form videos, covering pacing, jump cuts, captions and b-roll. If you haven’t set up your phone’s camera yet, go back to filming vertical video on a phone.
Practice
Do it now: find your best spot and test your sound
- Walk through your home with your phone on the front camera. Stand facing each window and pick the spot where your face is bright and evenly lit.
- Turn off the overhead lights and any lamps in that room, then record 10 seconds of yourself talking.
- Record the same 10 seconds twice more: once with the phone at arm's length, once with the phone (or a clip-on mic) about a foot from your mouth.
- Clap once loudly and listen for echo. If you hear a ring, add a blanket, cushions or a rug and clap again.
- Play all takes back with headphones and pick the clearest one. Write down the spot, the time of day and the mic distance.
Check yourself
Lesson quiz
4 questions. Get 3 right to complete the lesson. Your progress is saved in this browser.
Questions people ask
A ring light is fine for close-up talking videos and makeup, and it's easy to set up. It gives flat, even light and a ring reflection in your eyes. A small LED panel or softbox placed off to one side usually looks more natural. Try a window first, since it's free and often looks better than either.
Yes. Supported AirPods can act as the mic when you record video on an iPhone, and many wired earbuds with a mic work too. Because the mic sits near your mouth, they often sound better than the phone at arm's length. They can pick up rustling from clothes or hair, so test first.
Prevent it first: switch off fans, air conditioning and the TV, close windows and move the mic closer. After that, most editors have a noise-reduction or voice-enhance option. On iPhone 16 or later, Audio Mix in the Photos app can reduce background sounds on videos recorded with Spatial Audio.
For most beginners, a clip-on (lavalier) mic is the best first buy. A wired one that plugs into your phone costs very little, and a wireless clip-on kit costs more but lets you move freely. Pick one that matches your phone's port (USB-C or Lightning) or connects wirelessly.
Sources
Practice on your own videos
Short.now turns one long video into ready-to-post Shorts, TikToks and Reels with captions. Free plan, no watermark, no card.
Try Short.now free