
In this lesson (9 sections)
Key takeaways
- Edit in passes: cut, tighten, cover, caption, sound, export. Don't try to do it all at once.
- Start on your hook. Cut every hello, intro and breath before the first real line.
- Jump cuts are normal on short-form. Use b-roll or a small punch-in to hide the ones that jar.
- Burn in captions: short lines, high contrast, kept out of the bottom and right edges.
- Export at 1080 x 1920, 30 fps, as an MP4. Watch it once on your phone before posting.
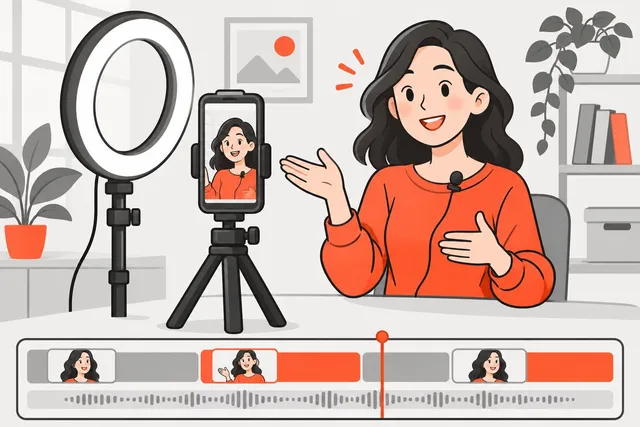
To edit a short-form video, work in passes: cut straight to your hook, tighten every pause with jump cuts, cover awkward cuts with b-roll, add readable captions, balance your voice against any music, and export at 1080 x 1920. A 30-second short usually takes 20 to 40 minutes this way once you’ve done a few. The goal of every pass is the same: remove anything that gives the viewer a reason to swipe.
Below is the workflow pass by pass, plus a quick look at free editors.
Before you start: pick one editor
You don’t need paid software. These free options all cover cutting, captions, music and vertical export:
| Editor | Where | Good to know |
|---|---|---|
| Built-in app editor (TikTok, Instagram, YouTube) | Phone | Fastest. Direct access to each app’s sounds and effects. Fewer precise controls. |
| Edits (by Instagram) | iPhone, Android | Instagram says exports have no watermark. Timeline editing, green screen, captions. |
| YouTube Create | iPhone, Android | Free with no ads, per YouTube. Includes captions and a royalty-free music library. Not available in every country. |
| CapCut | Phone, desktop | Popular, lots of templates and auto captions. Check what’s free and what’s paid in your region. |
| DaVinci Resolve, iMovie | Desktop | Free and powerful for longer edits. More to learn. |
Pick one and stick with it for your first 20 videos. Speed comes from knowing your tool, not from having the best one.
Tip
If you post the same video on several platforms, edit in a separate app and export a clean file. A TikTok download carries a TikTok watermark, and Instagram says it avoids recommending content that's largely reposted from somewhere else with only minor edits.
Pass 1: cut to the hook
Open your raw clip and find the first sentence that would make a stranger want to keep watching. Delete everything before it.
That usually means cutting:
- “Hey guys” and “So, today I want to talk about…”
- The second where you reach to press record
- A breath, a smile, a look off camera before you start
Your video should start mid-energy, on the first frame. If your hook is weak, no edit can save it, so check out how to write a hook that holds people and how to structure a short before you film the next one.
Pass 2: tighten with jump cuts
A jump cut is a cut within the same shot. You remove a piece of the middle, and the video jumps forward. On YouTube or TV that used to look like a mistake. On short-form it’s the normal style, because it removes dead air.
Go through the clip and cut:
- Pauses longer than a beat between sentences
- Filler words: um, uh, like, you know, so
- Repeats: if you said a sentence twice, keep the better take
- Detours: any sentence that doesn’t move toward the payoff
How tight is too tight?
Leave a tiny breath at the end of each sentence. If you cut every gap to zero, speech starts to sound robotic and viewers can’t keep up. Read it back at normal speed. If you can follow it easily on the first listen, it’s right.
A useful test: watch your edit and ask, every few seconds, “is something new happening right now?” A new idea, a new shot, a new piece of text. If nothing changes for a while, either cut there or cover it.
Speed
Some creators speed up their talking clips slightly, to around 1.1x. It can help with a slow delivery, but it’s easy to overdo. It’s better to speak with energy when filming than to fix it later.
Pass 3: cover cuts with b-roll and punch-ins
When you jump cut a talking-head shot, your head shifts a little in the frame on every cut. A few of those are fine. Many in a row look jittery. Two simple fixes:
Punch-ins. Zoom in on the next clip by about 10 to 20 percent, then back out on the one after. The change in framing makes the cut look deliberate. If you filmed in 1080p, keep the zoom small so the picture doesn’t get soft. If you filmed in 4K, you have room to zoom more.
B-roll. B-roll is any footage that isn’t you talking: your hands doing the thing, a screen recording, the product, the place, a photo. Place it over the cut while your voice keeps playing underneath. Good b-roll shows what you’re saying. If you say “I changed one setting,” show that setting.
Tip
Film b-roll on purpose while you're set up. Thirty seconds of close-ups and cutaways after every shoot gives you plenty to cover cuts later. Only use clips you filmed yourself or have the rights to use.
Pass 4: add captions that people can read
Many people scroll with the sound off, in public or late at night, so captions keep them watching. TikTok also lists closed captions as a way to make your videos accessible. Captions help people who are deaf or hard of hearing, and anyone watching in a second language.
Burned-in vs platform captions
- Burned-in captions are part of the picture. You style them, and they show everywhere you post.
- Platform captions (auto captions in TikTok or YouTube) can be switched on or off by the viewer, and you don’t control the look.
For shorts, most creators burn in their own captions. Either way, read every line. YouTube warns that automatic captions can misrepresent what was said because of mispronunciation, accents, dialects or background noise. Names and niche words get mangled the most.
Caption style rules
- Short lines. Three to six words on screen at a time, one or two lines max.
- High contrast. White or yellow text with a dark outline or a dark box behind it.
- Big enough to read on a phone at arm’s length without squinting.
- In the safe area. Above the bottom strip where each app’s caption and username sit, and away from the button column on the right. The format cheat sheet shows where those are.
- Match the words exactly. Paraphrased captions confuse people reading along.
For a full walk-through of caption tools, see how to add captions to videos automatically.
Pass 5: balance sound
Turn your phone’s volume up and listen to the whole video once with headphones.
- Voice first. Your voice should be the loudest thing, steady from start to finish. Raise clips that are quiet and lower ones where you were too close to the mic.
- Music low. If you add music, keep it well under your voice. TikTok’s checklist for business videos says to check volume levels so spoken words stay audible. When you’re not speaking, you can bring it up.
- Sound effects sparingly. A whoosh on a transition or a pop on a text reveal can add energy. One on every cut gets tiring fast.
- Noise reduction helps with a hiss or a hum, but too much makes your voice sound watery. Use the lightest setting that works.
Which music you can use, and where, depends on the platform and your account type. The music and copyright lesson explains the rules.
Pass 6: the ending and export
End on the payoff
Stop the video right after the payoff lands. Cut “thanks for watching,” a logo animation and a long call to action. If you can, make the last line lead back into the first, so the replay feels seamless.
Export settings
| Setting | Use |
|---|---|
| Resolution | 1080 x 1920 (9:16) |
| Frame rate | Same as you filmed, usually 30 fps |
| Format | MP4, H.264 |
| Quality | High or recommended. Not the smallest file. |
YouTube lists 1080p as the maximum resolution for Shorts uploads, so a 4K export mostly gives you a bigger file to upload.
Final check on your phone
Before you post, watch the exported file on your phone at full screen:
- Once with sound off. Can you follow it from the captions and visuals alone?
- Once with sound on. Is every word clear?
- Check that nothing important is hidden behind where the buttons and caption will sit.
Editing long videos into shorts
Everything above assumes you filmed the short on purpose. If your source is a long video, like a podcast, stream or webinar, most of the work is finding the right 30 to 60 seconds before you even start these passes. You can do that by hand by scanning the transcript, or let a clipping tool like Short.now pick the moments, reframe them to vertical and add captions, then do a final review and tweak yourself. Module 5 covers this workflow, starting with how to find the best moments.
What’s next
Your edit is clean. Now make sure the music and sounds in it won’t get your video muted, blocked or claimed. Next lesson: music, sounds and copyright for creators.
Practice
Do it now: edit one 30-second short in six passes
- Pick one raw take under 2 minutes and open it in a free editor (your app's built-in editor, CapCut, Edits or YouTube Create).
- Pass 1 and 2: trim the start so the video opens on your first real sentence, then cut every pause, 'um' and repeated line.
- Pass 3: add at least two b-roll shots or punch-ins over cuts that look jumpy.
- Pass 4: generate captions, fix every wrong word and move them above the bottom area of the screen.
- Pass 5 and 6: lower any music well under your voice, export at 1080 x 1920, then watch the result on your phone with sound off and then on.
Check yourself
Lesson quiz
4 questions. Get 3 right to complete the lesson. Your progress is saved in this browser.
Questions people ask
Start with the editor built into the app you post on, since it's free and has its trending sounds and effects. For more control, free mobile editors like CapCut, Instagram's Edits and YouTube Create all handle cuts, captions and music. On a computer, DaVinci Resolve and iMovie are free. Pick one and learn it well rather than switching often.
There's no fixed number. Cut whenever there's a pause, a repeated idea or a moment where nothing new happens. In a talking video that often means a cut every few seconds, but a strong uncut moment like a reaction or a demo can run longer. Let your retention graph tell you where people leave.
Use auto captions to save time, then read through and fix every mistake. Auto captions can misread names, slang and accents, and YouTube says they can be wrong because of mispronunciation or background noise. Burned-in captions you style yourself are easier to read than the app's default subtitles.
Export at 1080 x 1920 (9:16), the same frame rate you filmed at (usually 30 fps), as an MP4 with H.264. YouTube lists 1080p as the maximum resolution for Shorts uploads, so exporting in 4K mostly makes the file bigger.
Sources
Practice on your own videos
Short.now turns one long video into ready-to-post Shorts, TikToks and Reels with captions. Free plan, no watermark, no card.
Try Short.now free