
In this lesson (9 sections)
Key takeaways
- Batching means doing one kind of task many times in a row: plan all, then film all, then edit all, then schedule all.
- One planning hour and one 2-3 hour filming session can cover a month of shorts if you arrive with scripts ready.
- Templates (caption style, text styles, export presets, a caption sheet) do most of the speed-up in editing.
- Schedule ahead in each platform's own scheduler or a tool, and always keep a 1-2 week buffer.
- Leave a few open slots every week for trends, replies and anything that can't be planned.
Batch content creation means you plan a month of shorts in one sitting, film them in one session, edit them all together, and schedule them ahead, instead of doing every step every day. One planning hour and one 2 to 3 hour filming session can cover 20 to 30 posts, and the daily work drops to answering comments.
This lesson gives you a five-step batching workflow, the templates that make editing fast, how to schedule on each platform, and how to keep a batched feed from feeling stale.
What batching is and why it works
Every short you make involves the same steps: idea, script, setup, filming, editing, caption, upload. Done one video at a time, you repeat the setup every day and keep switching between thinking, performing and admin.
Batching groups the work by task:
| Session | What you do | Time for a month of shorts |
|---|---|---|
| Plan | Pick 20-30 ideas, write short scripts | 1-2 hours |
| Film | Record all of them, one after another | 2-3 hours |
| Edit | Cut, caption and export the whole batch | 3-5 hours manual |
| Package | Write every title, caption and hashtag set | 1 hour |
| Schedule | Queue everything on each platform | 30-60 minutes |
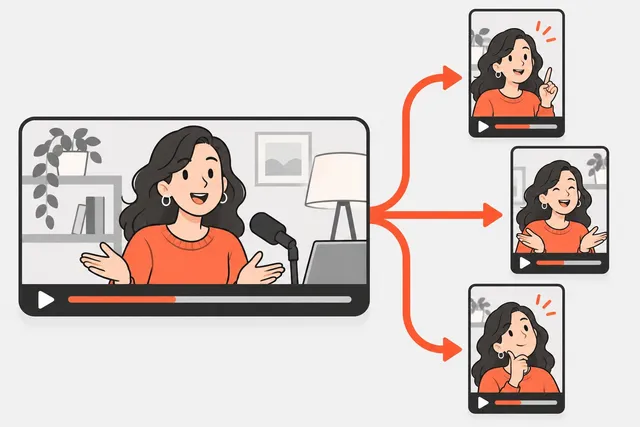
You can also batch from a long recording. If you already run the one recording a week system, your filming session is the long video and the edit session is clipping it. The rest of this lesson works the same way.
Step 1: Plan the month in one sitting
Arrive at filming day with every idea decided and scripted. This is the step people skip, and it is why their filming day turns into staring at the camera.
- Decide the number. How many shorts a week can you post on a normal week? Start with 3 to 5. The posting schedule lesson helps you pick.
- Fill the slots. Write one-line titles for every slot. Use content pillars, two or three themes you rotate, so the month has variety. For example: Monday a tip, Wednesday a story, Friday a myth.
- Script each one. Not word for word: a hook line, three bullet points and a closing line is enough. The script lesson has a template.
- Group by setting. Put every desk video together, every outdoor video together, every outfit change together.
Step 2: Film everything in one session
Set up once
Use the same spot, light, camera height and mic for the whole session. Before you start, record a 10-second test, watch it on your phone with sound, and fix anything now, not after 25 takes.
Session checklist
- Phone or camera charged, at least 30 GB free
- Do Not Disturb on
- Water, a printed list of scripts in order
- Teleprompter loaded or bullet points taped next to the lens
- Two shirts if you want to change looks between groups
Run of show
Go through the scripts in order. For each one:
- Say the title out loud at the start of the take (this is your slate, so you can find it later).
- Do the take. If you stumble, pause, then restart from the start of the sentence. You will cut the mistake later.
- Do a second take only if the first one felt flat.
- Tick it off and move on. Do not watch it back now.
Take a 5-minute break every 30 to 40 minutes. Energy drops slowly, and you will not notice it until you watch the last takes. Our free teleprompter helps you keep a steady pace across many takes.
Step 3: Edit with templates
Templates do most of the speed-up in editing. Set these up once:
- A project template at 1080x1920 with your caption style, fonts and colors saved.
- A text style for the hook line on screen, saved as a preset.
- An export preset (1080x1920, H.264, your frame rate).
- A naming pattern such as
2026-11-12_tip_phone-settings.mp4, so file names sort by date.
Then edit in passes across the whole batch rather than finishing one video at a time:
- Rough cut pass: cut every video to its best take, trimming the start and end.
- Caption pass: auto-caption all of them, then fix the errors.
- Polish pass: add the hook text, b-roll and music where needed.
- Export pass: export everything at once.
A consistent look is good for recognition, and YouTube’s monetization policy says using the same intro and outro across videos is fine as long as the bulk of each video differs. The content of each short should be its own idea, not the same video with a new title. The editing lesson in Module 4 covers pacing and captions in detail.
Step 4: Write every caption at once
Make a sheet with these columns: file name, title, caption, hashtags, platform, publish date. Fill the whole thing in one sitting. Writing 25 titles in a row is easier than writing one a day, because you get into a rhythm and stop repeating yourself.
If you get stuck, the free YouTube title generator and hashtag generator give you starting points to edit.
Step 5: Schedule it all
Each platform has its own scheduler:
- YouTube: in YouTube Studio on a computer, you can upload up to 15 videos at once. On the Visibility step, choose Schedule and pick a date, time and time zone. YouTube says the video stays private until that time.
- TikTok: TikTok offers scheduling from its web upload page (TikTok Studio). When it launched, TikTok said posts could be scheduled from 15 minutes up to 10 days ahead. Check the date picker for the current limit.
- Instagram: scheduling is available in the Instagram app for many accounts (look for the schedule option before you share) and in Meta Business Suite on a computer. How far ahead you can go is set by Meta, so check it in the scheduler.
Doing this in three places takes time, and the shorter windows on some apps mean you have to come back every week or so. A scheduling tool that posts to all three from one queue saves that. Short.now can find the clips in your long video, then auto-post them to TikTok, YouTube and Instagram on a schedule you set (auto-posting is on the Creator plan and above).
Tip
Stay one to two weeks ahead. If this week's posts were filmed last week, a sick day, a bad recording or a busy month never breaks your streak. Treat the buffer as part of the system, not a bonus.
A sample month
Here is what a batch month looks like for someone posting 5 shorts a week, about 4 hours of work a week in total:
| Week | Monday | Tuesday | Wednesday | Thursday | Ongoing |
|---|---|---|---|---|---|
| 1 | Plan month 2 (1-2 h) | Film batch (3 h) | Edit pass (2 h) | Edit and export (2 h) | Month 1 posts going out |
| 2 | Write captions (1 h) | Schedule month 2 (1 h) | Free | Free | Comments, trends |
| 3 | Free | Review month 1 numbers (30 min) | Free | Film 2-3 trend videos | Comments, trends |
| 4 | Pick month 3 themes | Free | Free | Free | Comments, trends |
The free days are not wasted. They are where you reply to comments, react to trends and make one-off videos that cannot be planned.
Keep a batched feed from feeling stale
- Leave open slots. Keep one or two posts a week unplanned for trends and replies to comments.
- Vary the look. Change your shirt, angle or spot between groups.
- Mix formats. Talking head, screen share, clips from your long video, a reply to a comment.
- Check before it goes out. Skim the next week’s queue each Monday. If something has become out of date, swap it for a buffer post.
- Review monthly. Note which videos won, then plan more of those in the next batch.
What’s next
You now have the full repurposing toolkit: a weekly system, moment picking, reframing and batching. Module 6 is about getting those posts seen, starting with how to go viral on TikTok and what you can actually control.
Practice
Do it now: plan your first batch
- Open the publishing calendar and mark how many shorts a week you will post (start with 3 to 5).
- Write that many ideas for the next 4 weeks as one-line titles. Use your idea bank or the ideas lesson if you get stuck.
- Group the ideas by setting: which ones you can film at your desk, which need a different spot or outfit.
- Pick a 3-hour slot this week for filming and put it in your calendar like a meeting.
- Create a caption sheet with columns: file name, title, caption, hashtags, platform, date.
Check yourself
Lesson quiz
4 questions. Get 3 right to complete the lesson. Your progress is saved in this browser.
Questions people ask
It is making many pieces of content in one go, grouped by task. You plan a month of ideas in one sitting, film them in one session, edit them together and schedule them, instead of doing all four steps every day.
Start with one or two weeks of posts, for example 6 to 10 shorts. Once the process feels easy, move to a full month. A batch that is too big for your first try usually ends half-finished.
Yes. YouTube Studio has a Schedule option on upload, TikTok has scheduling in TikTok Studio on the web, and Instagram posts can be scheduled in the app or Meta Business Suite. How far ahead you can schedule differs by platform and changes over time, so check the date picker in each scheduler.
Only if you let them. Change your shirt or the camera angle between groups, film in two spots, and mix formats (talking head, screen share, clip from your long video). Reusing the same intro or caption style is fine; the content itself should vary.
Sources
Practice on your own videos
Short.now turns one long video into ready-to-post Shorts, TikToks and Reels with captions. Free plan, no watermark, no card.
Try Short.now free